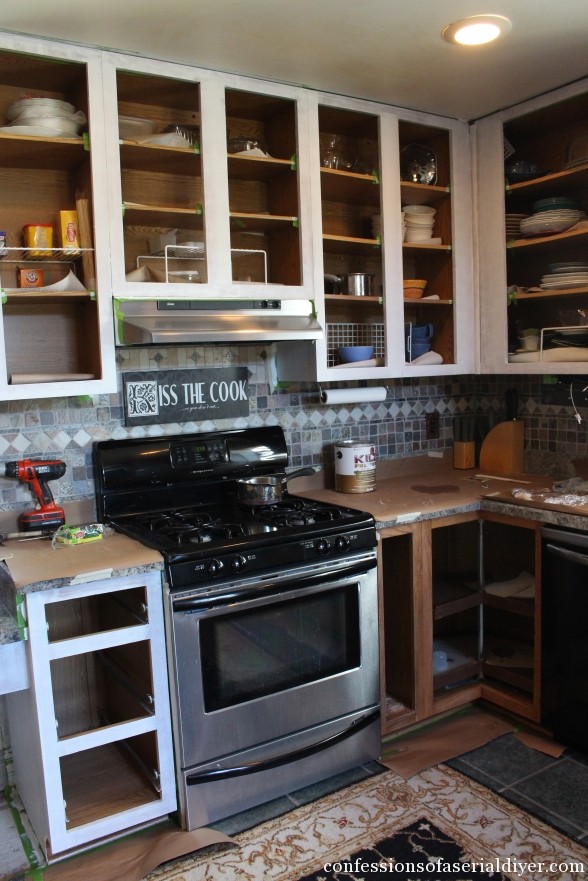
How to Paint Kitchen Cabinets : A Step-by-Step Guide. Painting kitchen cabinets is a great way to update the overall look of your kitchen without breaking the bank. It may seem like a daunting task, but with the right tools and techniques, it can be a simple and rewarding DIY project. The first step is to thoroughly clean and prep the cabinets by removing all hardware, sanding down any rough areas, and wiping them down with a degreaser. Next, prime the cabinets with a high-quality primer and let it dry completely. Once the primer is dry, you can begin painting with a high-quality paint and a brush or roller. Be sure to apply thin, even coats and allow each coat to dry completely before applying the next. Finally, reattach the hardware and your newly painted kitchen cabinets will give your kitchen a fresh new look.
Key Takeaways
| Step | Key Points |
|---|---|
| Preparation | Remove hardware, clean surfaces, sand, and apply primer. |
| Painting | Use a high-quality brush or roller, apply even coats, and allow proper drying time. |
| Reassembly | Once dry, reattach hardware and enjoy your refreshed cabinets. |
Part 1: Preparation
Materials Needed
- Screwdriver
- TSP (Trisodium Phosphate) or a degreaser
- Sandpaper (100 to 220 grit)
- Tack cloth or microfiber cloth
- Painter’s tape
- Primer
- Paint
- High-quality brushes and rollers
Steps for Preparation
- Remove Hardware: Take off all knobs, pulls, and hinges using a screwdriver.
- Clean Surfaces: Wipe down all surfaces with TSP or a degreaser to remove grease and dirt.
- Sand Surfaces: Lightly sand all surfaces with 100 to 220 grit sandpaper to ensure the paint adheres well.
- Wipe Down: Use a tack cloth or microfiber cloth to remove all dust from sanding.
- Apply Painter’s Tape: Protect walls and countertops by applying painter’s tape to edges and areas not being painted.
Table of Preparation Steps
| Step | Description | Tools & Materials |
|---|---|---|
| 1. Remove Hardware | Take off knobs, pulls, and hinges. | Screwdriver |
| 2. Clean Surfaces | Wipe down with TSP or degreaser. | TSP, Cloth |
| 3. Sand Surfaces | Sand to create a smooth surface. | Sandpaper |
| 4. Wipe Down | Remove dust from sanding. | Tack cloth |
| 5. Tape Edges | Apply tape to protect areas. | Painter’s tape |
Part 2: Painting and Finishing
Painting Tips
- Choose the Right Paint: Opt for a semi-gloss or gloss finish which are easier to clean and more durable.
- Brush vs. Roller: Use a brush for detailed areas and a roller for flat panels.
- Even Coats: Apply thin, even coats to prevent drips and ensure a smooth finish.
Steps for Painting
- Apply Primer: Use a primer suitable for your cabinet material.
- First Paint Coat: After the primer dries, apply the first coat of paint.
- Sanding Between Coats: Once dry, lightly sand for a smooth base before the next coat.
- Final Coat: Apply the final coat of paint and allow it to dry completely.
Table of Painting Steps
| Step | Description | Tips |
|---|---|---|
| 1. Apply Primer | Essential for paint adhesion. | Let it dry fully. |
| 2. First Paint Coat | Apply an even first layer. | Use a high-quality brush/roller. |
| 3. Sanding | Lightly sand for smoothness. | Use fine-grit sandpaper. |
| 4. Final Coat | Apply the last layer of paint. | Allow ample drying time. |
Part 3: Final Touches
Reassembling Cabinets
Once the final coat of paint is dry, it’s time to put everything back together.
- Reattach Hardware: Carefully screw the knobs, pulls, and hinges back onto the cabinets.
- Remove Painter’s Tape: Gently peel off the painter’s tape to reveal clean edges.
- Adjust Doors and Drawers: Make sure all doors and drawers align properly and make any necessary adjustments.
Table of Reassembly Steps
| Step | Description |
|---|---|
| 1. Reattach Hardware | Screw the hardware back onto the cabinets. |
| 2. Remove Painter’s Tape | Peel off the tape to reveal clean edges. |
| 3. Adjust Doors/Drawers | Ensure proper alignment and function. |
Maintenance Tips
To keep your cabinets looking their best, follow these maintenance tips:
- Regular Cleaning: Wipe down your cabinets with a soft cloth and mild soap. Avoid harsh chemicals.
- Touch-Ups: Keep some leftover paint for quick touch-ups on chips or scratches.
- Hinge Lubrication: Apply lubricant to hinges if they start to squeak.
List of Maintenance Tips
- Clean cabinets regularly with mild soap.
- Perform touch-ups as needed.
- Lubricate hinges to prevent squeaking.
Conclusion
Congratulations on completing your kitchen cabinet painting project! With these steps, you’ve not only transformed the look of your kitchen but also added personal value to your home. Remember, the longevity of your paint job depends on the quality of the preparation and the care you take in maintaining your cabinets. Enjoy your refreshed space!
For more information on the types of paint and detailed painting techniques, you can visit Wikipedia’s page on painting.
Painting your kitchen cabinets can be a fulfilling project that brightens up your home. With the right approach and care, your hard work will result in a kitchen you can be proud of for years to come. Happy painting!
